RL-based Gait Training and Deployment Guide - V1.2.1
Description
Reference project:
-
https://github.com/UBTECH-Robot/TienKung-Lab
This codebase is a reinforcement learning-based locomotion control system designed specifically for the full-size humanoid robot TienKung. It combines AMP-style rewards with periodic gait rewards, promoting natural, stable, and efficient walking and running behavior.
Built on IsaacLab, the codebase supports Sim2Sim migration to MuJoCo and features a modular architecture for seamless customization and expansion. Furthermore, it integrates light-projection-based sensors to enhance perception, enabling precise interaction with the environment and obstacle avoidance. The framework has been successfully validated on the real TienKung robot.
-
https://github.com/UBTECH-Robot/Deploy_Tienkung
This codebase contains two directories:
rl_control_newandx_humanoid_rl_sdk.rl_control_newis a ROS2-based reinforcement learning control library for humanoid robots, used to control the Tienkung series of humanoid robots. This library uses reinforcement learning algorithms to implement robot locomotion control and supports both simulation and real-world robot environments.The other directory,
x_humanoid_rl_sdk, is the Tienkung humanoid robot reinforcement learning control SDK, which includes state machine implementations, robot interfaces, and control algorithms.
This guide, based on the reference project, resolves some compilation and configuration issues.
- Compatible Models:Walker Tienkung (Lite). Walker Tienkung · Voice & Vision (Plus) and Walker Tienkung · Embodied Intelligence (Pro) will be added in Q1 2026.
- Operating System: Ubuntu 22.04 (x86)
- Recommended GPU: Nvidia RTX 30 series and above, 16GB+ VRAM
- Minimum System Configuration: 512GB disk, 16GB RAM
- Note: If git or other resource downloads are slow, it is recommended to use a proxy
Software Package Structure
Download the two packages TienKung-Lab.zip and ros_lite_src.zip and place them in the ~/ directory.
~/                                 # Software packages
├── TienKung-Lab.zip               # Gait training package
├── ros_lite_src.zip               # Gait deployment package
Part I: Basic Software
1. CUDA
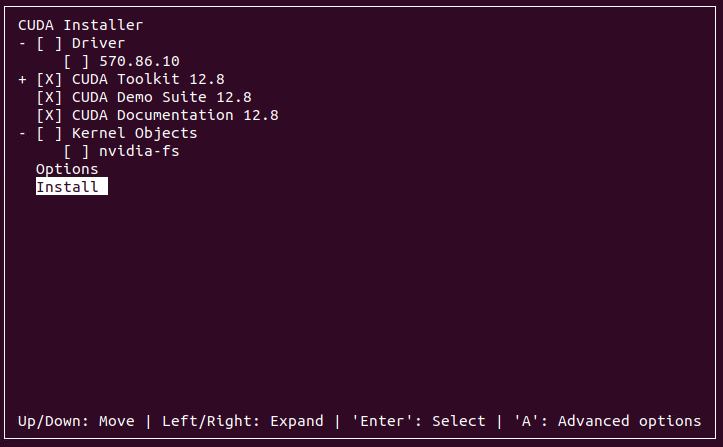
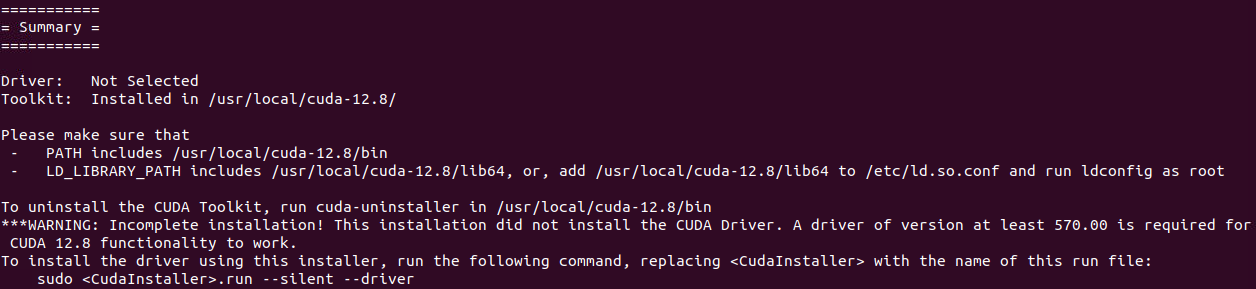
Install CUDA.
It is recommended to first correctly install the latest Nvidia driver, then use nvidia-smi to check the CUDA version compatible with the driver, and select the corresponding CUDA Toolkit download from https://developer.nvidia.com/cuda-toolkit-archive. This example uses CUDA version 12.8.
cd ~/
wget https://developer.download.nvidia.com/compute/cuda/12.8.0/local_installers/cuda_12.8.0_570.86.10_linux.run
sudo sh cuda_12.8.0_570.86.10_linux.run
# Set environment variables in ~/.bashrc
echo 'export PATH=/usr/local/cuda/bin:$PATH' >> ~/.bashrc
echo 'export LD_LIBRARY_PATH=/usr/local/cuda/lib64:$LD_LIBRARY_PATH' >> ~/.bashrc
# Apply changes immediately
source ~/.bashrc
2. Conda
Install Miniconda, keep selecting yes to complete the installation.
cd ~/
wget https://repo.anaconda.com/miniconda/Miniconda3-latest-Linux-x86_64.sh
bash ./Miniconda3-latest-Linux-x86_64.sh
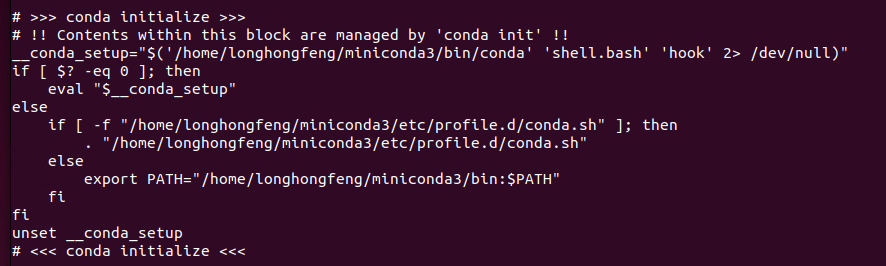
Note: Once installed, check if conda environment variables are set in the .bashrc file.
cat ~/.bashrc
3. IsaacSim
Install IsaacSim 4.5. After downloading and extracting the software package, create the env_isaacsim environment, activate it, and then install.
Reference: https://docs.isaacsim.omniverse.nvidia.com/4.5.0/installation/install_workstation.html
mkdir ~/isaacsimdir
cd ~/isaacsimdir
wget https://download.isaacsim.omniverse.nvidia.com/isaac-sim-standalone-4.5.0-linux-x86_64.zip
unzip "isaac-sim-standalone-4.5.0-linux-x86_64.zip" -d ~/isaacsimdir
conda create -n env_isaacsim python=3.10
conda activate env_isaacsim
./python.sh -m pip install torch torchvision torchaudio --index-url https://download.pytorch.org/whl/cu128
./post_install.sh
./isaac-sim.selector.sh
conda deactivate
4. IsaacLab
Install IsaacLab 2.1.0. After downloading and extracting the software package, create the env_isaaclab environment, activate it, and then install.
You can start referring from the "Installing Isaac Lab" section.
sudo apt install git
mkdir ~/isaaclabdir
cd ~/isaaclabdir
wget https://github.com/isaac-sim/IsaacLab/archive/refs/heads/release/2.1.0.zip
unzip "2.1.0.zip" -d ~/isaaclabdir
cd IsaacLab-release-2.1.0
ln -s ~/isaacsimdir ~/isaaclabdir/IsaacLab-release-2.1.0/_isaac_sim
./isaaclab.sh --conda env_isaaclab
conda activate env_isaaclab
sudo apt install cmake build-essential
./isaaclab.sh --install
conda deactivate
-
If you encounter a permission error when executing
./isaaclab.sh --install, it's likely due to insufficient permissions in the linked directory corresponding to the_isaac_simdirectory. Try modifying the permissions. -
If you encounter a pip package conflict error, ignore it for now. After
--installcompletes, try the subsequent steps to see if training can start normally.
Special Note for RTX 50 Series GPUs: please use the latest PyTorch nightly version instead of the PyTorch 2.5.1 bundled with Isaac Sim. Note that cu128 in the URL must match your CUDA version.
~/isaaclabdir/IsaacLab-release-2.1.0/isaaclab.sh -p -m pip install --upgrade --pre torch --index-url https://download.pytorch.org/whl/nightly/cu128
Part II: Gait Training & Deployment
Using TienKung-Lab open-source framework for gait training
1. Extract Code
cd ~/
unzip TienKung-Lab.zip
2. Environment Installation
-
Install the PyTorch version compatible with your CUDA. For example, you can go to https://mirrors.nju.edu.cn/pytorch/whl/ to check the corresponding version, then update the corresponding pip command. Note that [cu128] in the URL must match your CUDA version.
-
All subsequent commands require activating the
env_isaaclabenvironment withconda activate env_isaaclabto run properly.
conda activate env_isaaclab
cd ~/TienKung-Lab
pip install -e .
pip install -U --index-url https://mirrors.nju.edu.cn/pytorch/whl/cu128/ torchvision==0.24.0 torch==2.9.0
pip uninstall -y rsl-rl-lib || true
cd ~/TienKung-Lab/rsl_rl
pip install -e .
pip install onnxscript
3. Training
Train the policy using AMP expert data from tienkung/datasets/motion_amp_expert.
The concept of AMP (Adversarial Motion Priors) was first proposed by the academic community:
Training a high-dimensional simulated agent with an under-specified reward function often leads the agent to learn physically infeasible strategies that are ineffective when deployed in the real world. To mitigate these unnatural behaviors, reinforcement learning practitioners often utilize complex reward functions that encourage physically plausible behaviors. However, a tedious labor-intensive tuning process is often required to create hand-designed rewards which might not easily generalize across platforms and tasks. We propose substituting complex reward functions with "style rewards" learned from a dataset of motion capture demonstrations. A learned style reward can be combined with an arbitrary task reward to train policies that perform tasks using naturalistic strategies. These natural strategies can also facilitate transfer to the real world.
So what exactly is the AMP expert data here? It's actually a "reference motion trajectory that closely resembles a human movement."
Ordinary reinforcement learning can only set rewards like the following:
- Don't fall +1
- Speed close to the target +1
- Low energy +1
The results usually look like this:
- Strange, shaky, stiff gait
- Like a "mechanical monster"
But numerically perfectly valid.
The reason is that the reward function cannot fully describe "natural human movement." However, by providing the AMP expert data to the algorithm, it can determine during training: "How similar is this movement to the given reference motion data?", and then assign a reward, completing the training.
Parameters:
--task: Task type (options:walk,run)--headless: Train without GUI display--num_envs: Number of robot instances in the scene--max_iterationsThe default value is 50000
The current software package supports the Lite model; Plus and Pro models will be added in Q1 2026.
Start training
cd ~/TienKung-Lab
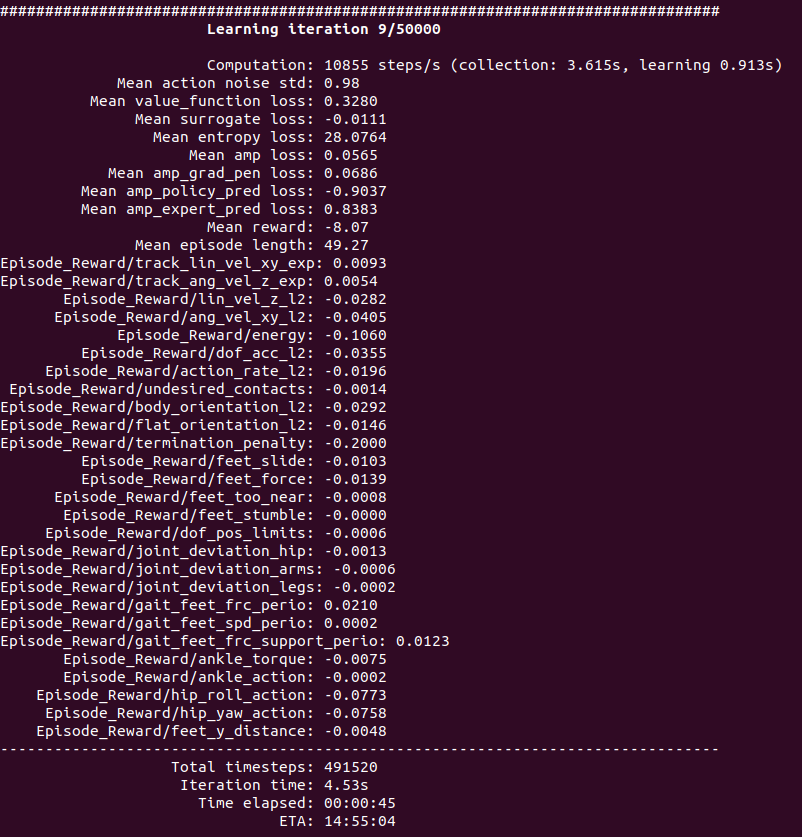
python legged_lab/scripts/train.py --task=walk --headless --logger=tensorboard --num_envs=2048
- If using the default training iterations of 50,000, it will take approximately 18 hours on an RTX 4090 graphics card.
- Currently, the software package supports Tiangong Walker (Lite), Tiangong Wujie (Plus), and Tiangong Wujiang (Pro), which will be added in Q1 of 2026.
Model location: ~/TienKung-Lab/logs/walk/xxxx/model_xxx.pt, where the .pt file is the model, and xxxx is a timestamp-named folder created when training starts. For example:
~/TienKung-Lab/logs/walk/202x-01-12_05-07-14/model_100.pt~/TienKung-Lab/logs/walk/202x-01-12_05-07-14/model_49900.pt
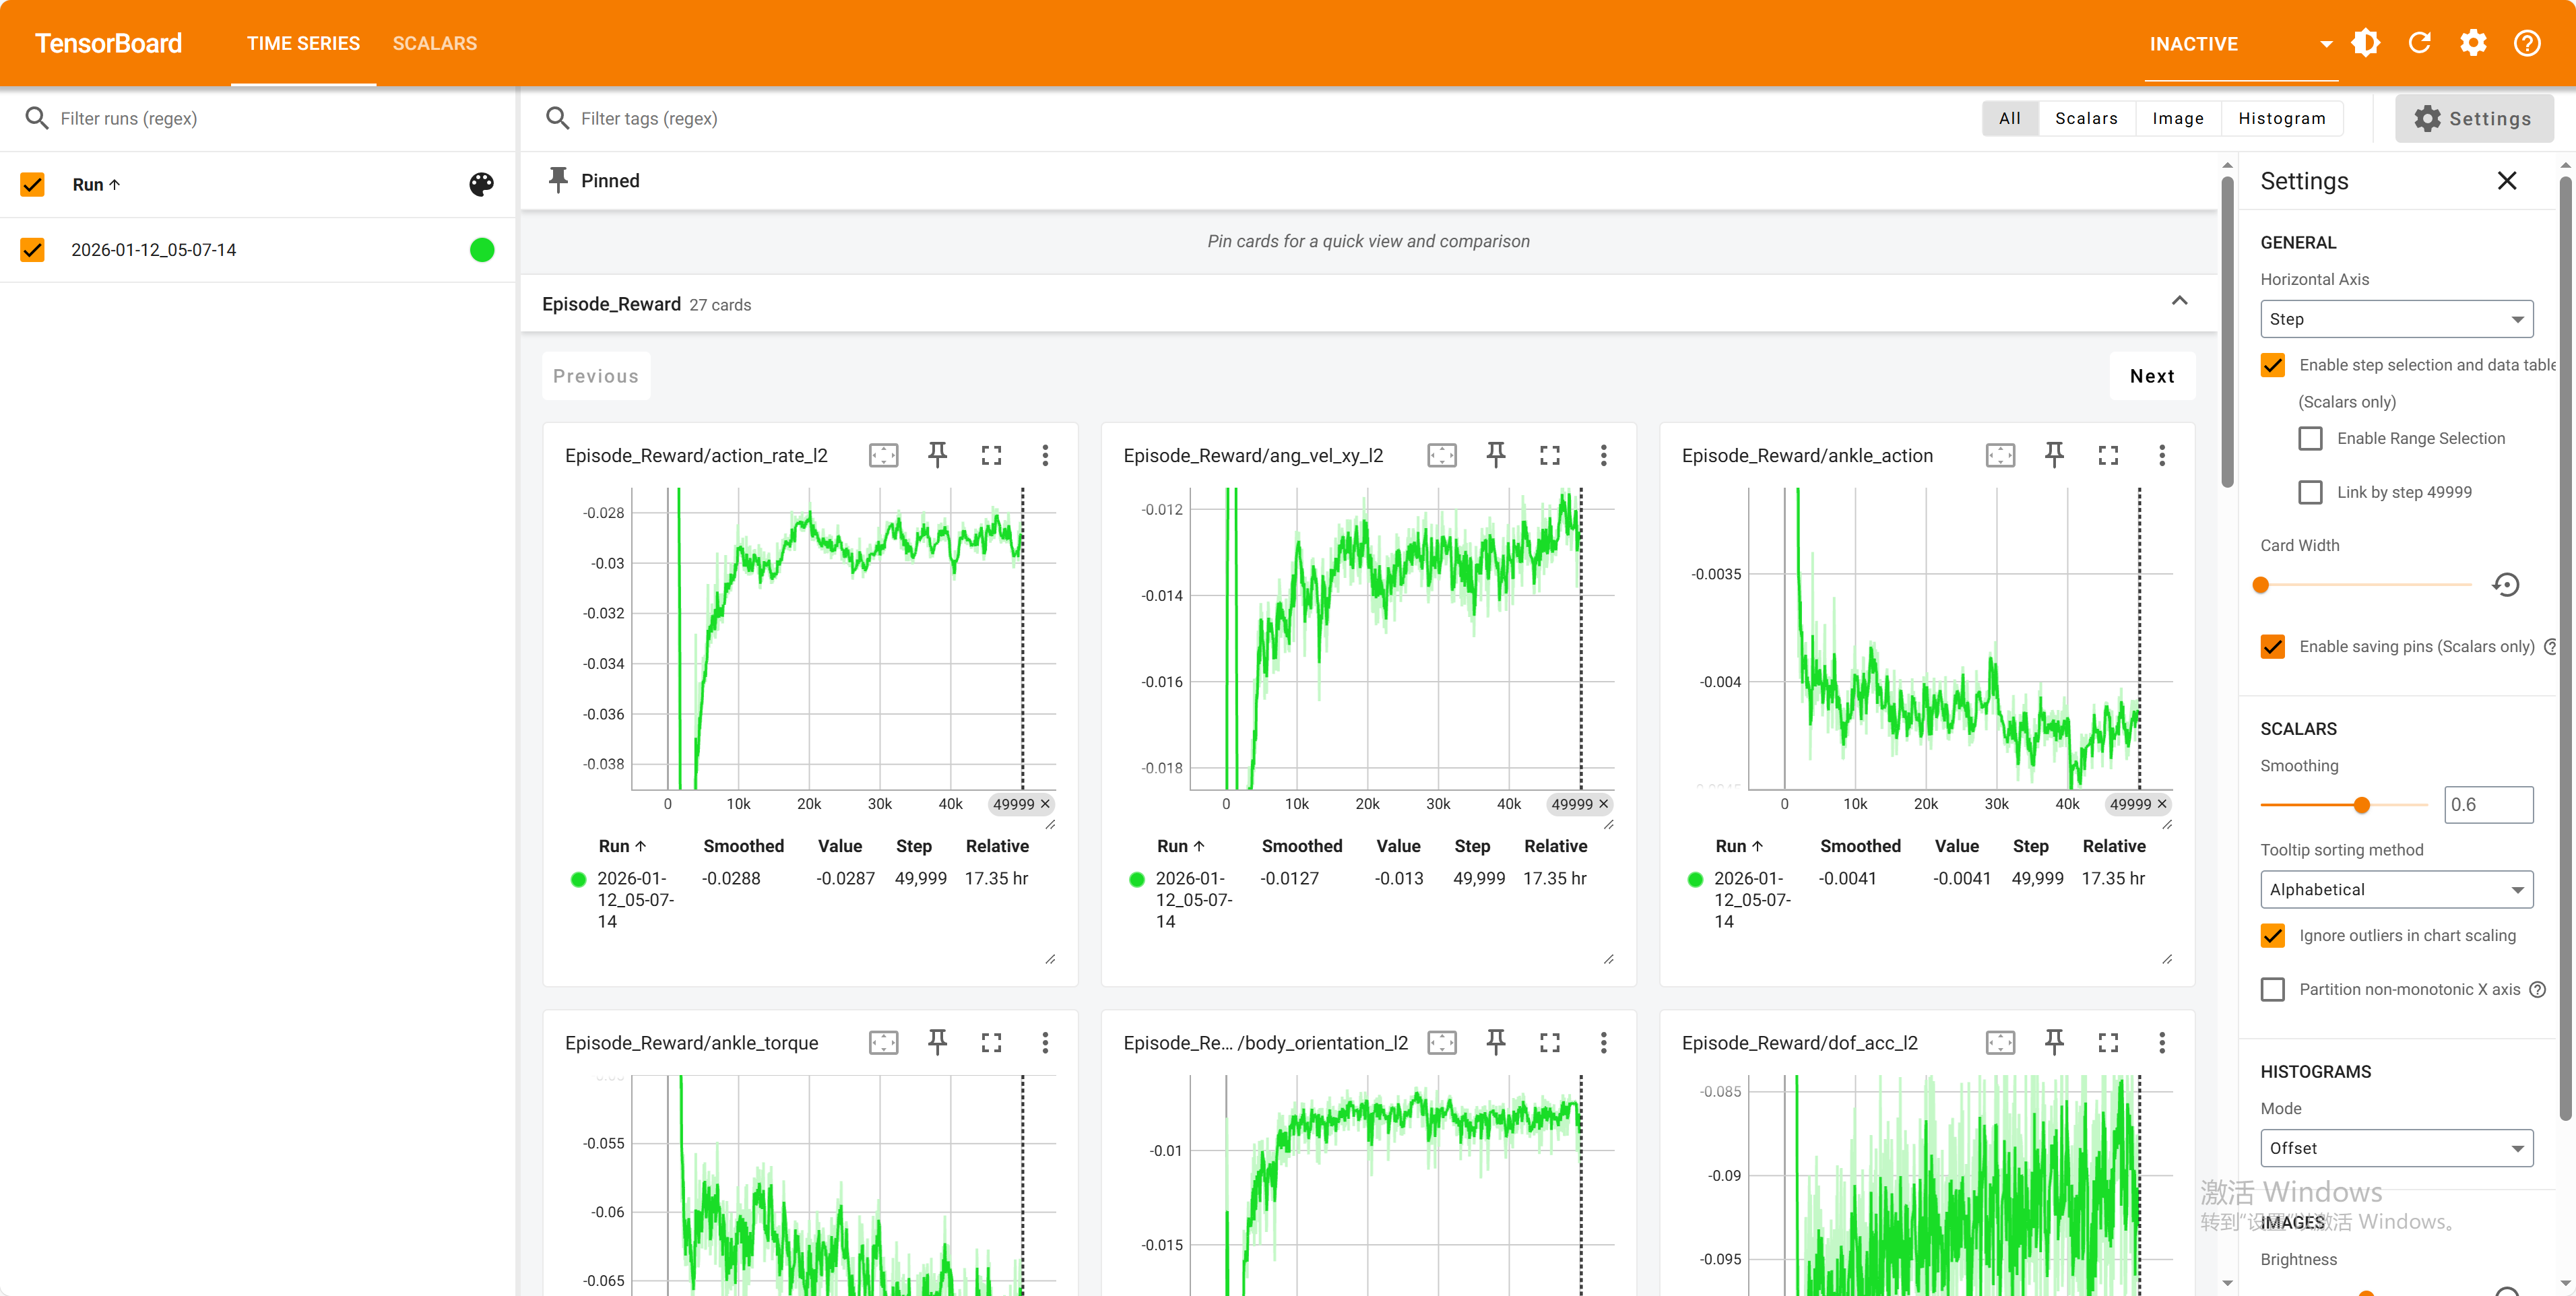
Check status
Open a new terminal to check the training status:
conda activate env_isaaclab
cd ~/TienKung-Lab
tensorboard --logdir=logs/walk

4. Resume Training
cd ~/TienKung-Lab
mkdir ~/TienKung-Lab/logs/walk/pretrained
# Copy the PT file to folder【pretrained】
python legged_lab/scripts/train.py --task=walk --headless --logger=tensorboard --num_envs=2048 --resume=True --load_run=pretrained --checkpoint=model_8100.pt
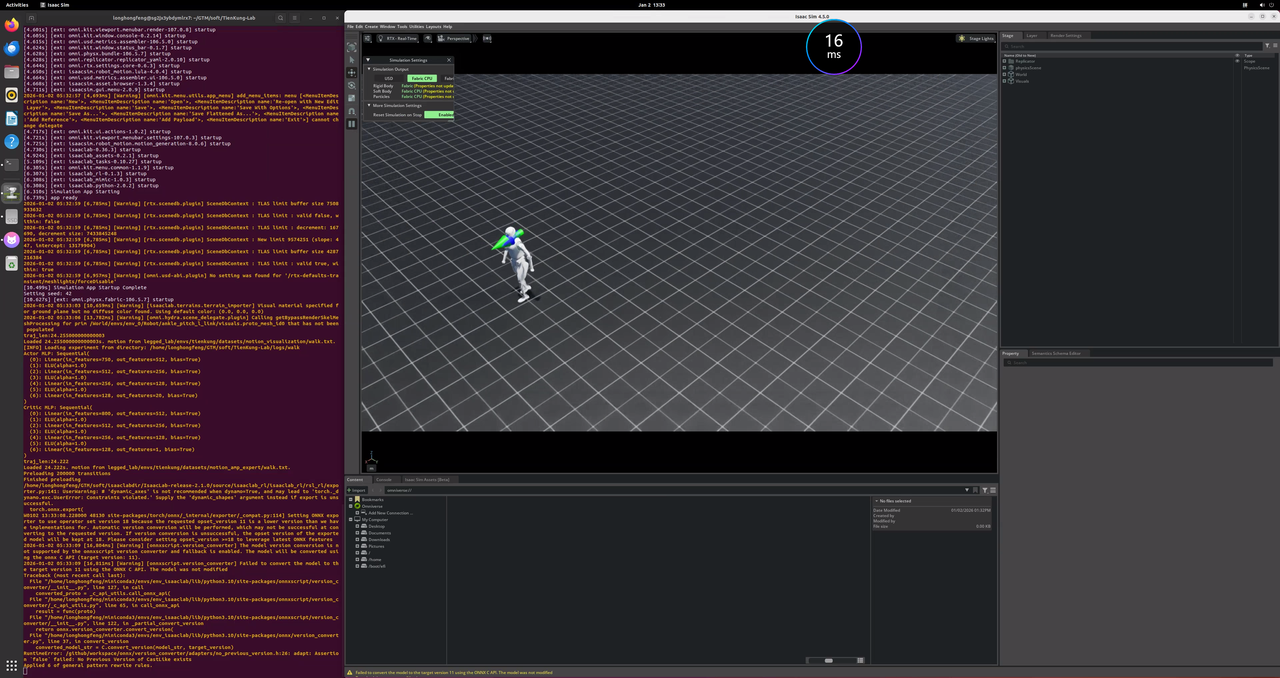
5、Run in the simulation environment (Isaac Lab)
Load and run the trained model in the Isaac Lab simulation environment.
- --task: Task type, either walk or run
- --num_envs: Number of robots in the scene
- --load_run: Directory containing the .pt file, defaults to the directory of the latest training file
- --checkpoint: Filename of the .pt file, defaults to the file generated by the latest training file
cd ~/TienKung-Lab
mkdir ~/TienKung-Lab/logs/walk/exe
# copy .pt to exe dir,for example:~/TienKung-Lab/logs/walk/exe/model_49900.pt
python legged_lab/scripts/play.py --task=walk --num_envs=1 --load_run=exe --checkpoint=model_49900.pt
The play.py script will also export the model used in the current run in both .pt and .onnx formats, and save them to the exported/ subdirectory under the same directory, for example:
~/TienKung-Lab/logs/walk/exe/exported/policy.pt~/TienKung-Lab/logs/walk/exe/exported/policy.onnx
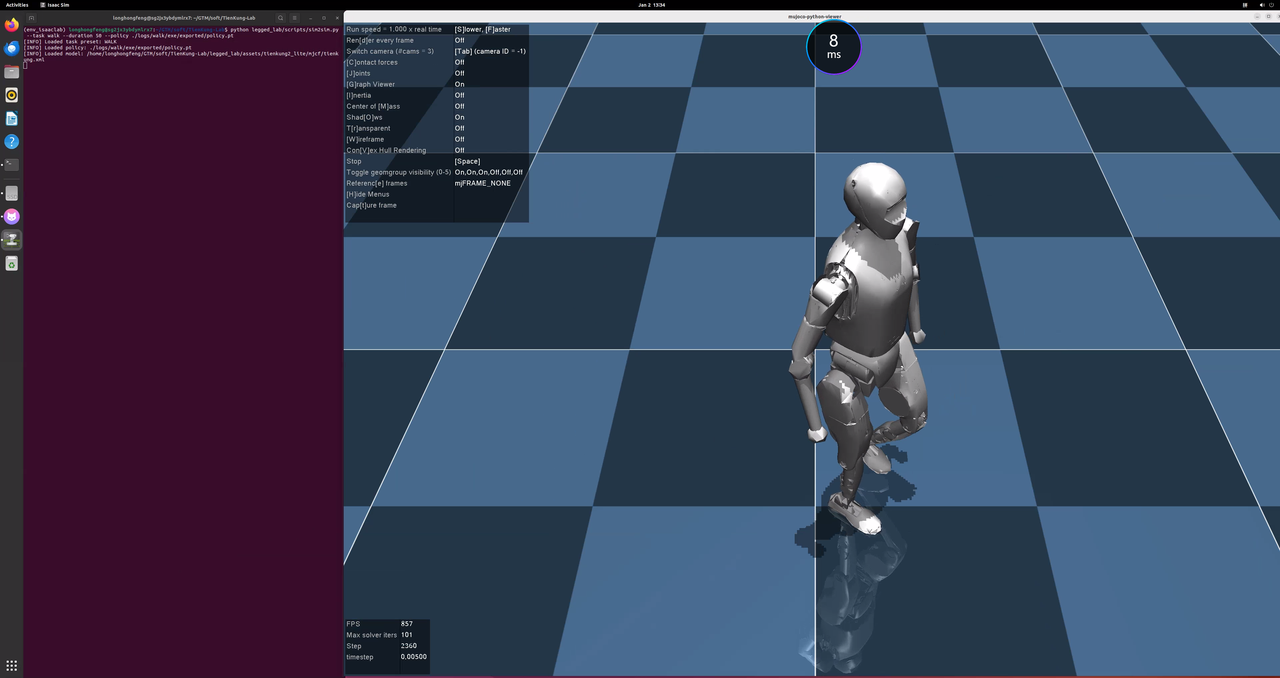
6. Sim2Sim (MuJoCo)
Load the trained model in MuJoCo to perform cross-simulation validation.
When executing the play script in the aforementioned Run step, the trained model will be automatically exported and saved to the exported/ subdirectory under the same directory. It can be directly specified here using the --policy argument.
Run MuJoCo simulation with the trained policy:
cd ~/TienKung-Lab
python legged_lab/scripts/sim2sim.py --task walk --duration 50 --policy ./logs/walk/exe/exported/policy.pt
7. Model Conversion
Use OpenVINO for model conversion to obtain .bin and .xml files
cd ~/TienKung-Lab
pip install openvino
ovc logs/walk/exe/exported/policy.pt --output_model logs/walk/exe/exported/
8. Deployment
Deploy the trained locolocomotion control model to the ros_lite project on the training machine.
Copy model files
Copy .bin、.xml and .pt to ~/ros_lite/install/rl_control_new/share/rl_control_new/config/policy/ dir。
cd ~/
unzip ros_lite_src.zip -d ros_lite
cd ~/TienKung-Lab/logs/walk/exe/exported/
cp policy.pt policy.bin policy.xml ~/ros_lite/install/rl_control_new/share/rl_control_new/config/policy/
Ensure you use the correct model file
Ensure that mlp.path in the configuration file ~/ros_lite/install/rl_control_new/share/rl_control_new/config/tg22_config.yaml points to the correct name of the model you just trained; no suffix is needed.
For example, if the trained model files include policy.pt, policy.bin, and policy.xml, then the value of mlp.path in the configuration file should be set to /config/policy/policy.
cd ~/ros_lite/install/rl_control_new/share/rl_control_new/config/
cat tg22_config.yaml

The actual model files used for locomotion control are .bin and .xml.
Here, the model file is directly copied into the compiled output directory of the ros_lite project, which is suitable for scenarios where no further compilation is performed on the real robot.
If the project will be recompiled on the real robot, the model file can be copied to the ~/ros_lite/src/rl_control_new/config/policy directory. After the project is transferred to the real robot, it can then be compiled there.
9. Deployment of real devices
Package the entire ~/ros_lite directory on the training machine, place it on the x86 board of Tiangong Xingzhe (192.168.41.1), and unzip it in the /home/ubuntu/ directory. At this point, the gait training model has been deployed to the Tiangong real machine.
Preparing for the test
- On the x86 board at 192.168.41.1, ensure that the robot's auto-start service is disabled.
sudo systemctl status proc_manager.service - Check if the service status is disabled; if not, disable it manually.
Then power off and restart the entire robot, and wait for the restart to complete.
sudo systemctl disable proc_manager.service - Manually start the body_control on the x86 board with IP address 192.168.41.1.
tmux
sudo su
cd ros2ws
source install/setup.bash
ros2 launch body_control body.launch.py - Launch another terminal to initiate the reinforcement learning operation and control for this training session.
 tmux
 cd ~/ros_lite
 source install/setup.bash
 ros2 launch rl_control_new rl.launch.py
Since this is a newly trained model, the results cannot be guaranteed, so safety must be ensured:
- The robot must be connected to the transfer machine with a rope. The rope should not be too loose to prevent the robot from falling too forcefully in an emergency and causing danger.
- And there is another person ready to press the emergency stop button at any time.
Remote Control Button Instructions
| Button | Function |
|---|---|
| A key + G key (switch to middle zero position) | Switch to MLP (Machine Learning Policy) control mode |
| D key | Switch to ZERO (Zeroing) control mode |
| C key | Switch to STOP (Stop) control mode |
| Left joystick | Control robot forward/backward and left/right movement |
| Right joystick | Control robot turning (left/right) |
After starting the locolocomotion control service, pressing A will cause the robot to transition directly from the homing (zeroing) state into the walking state. There is no standing state! This is particularly important to note.
Control logic description
- The robot's initial state is STOP mode. After startup, press ZERO mode to ensure all joints of the robot return to the set zero position
- Press A key + G key (switch to middle zero position) to switch to MLP mode, the robot starts walking. Note: the robot will not enter the standing state.
- Press D key to return to ZERO mode, the robot returns to the initial posture
- Press C key to enter STOP mode, maintaining the current posture
- State switching flow: STOP -> ZERO -> MLP -> STOP
Then, under the premise of ensuring safety, you can gradually use the remote control to operate the robot to return to zero, and walk.
Reference:https://github.com/Open-X-Humanoid/Deploy_Tienkung/tree/main/rl_control_new