Walker Tienkung Operation Guide
This document describes the basic flow for using Thinker studio v2.0.x with Walker Tienkung for Pico teleoperation, motion recording, data collection, quality inspection, and export.
For general installation configuration, service management, and Pico-side operations, please refer to:
Applicable Environment
| Item | Requirement |
|---|---|
| Target Machine | PC with Ubuntu 22.04 |
| System Architecture | amd64 |
| Hardware | Recommended memory ≥ 32 GB, minimum 16 GB |
| Installation Package | deb/thinker-studio_2.0.35_amd64.deb |
Network Configuration
After connecting the target machine and Walker Tienkung with an Ethernet cable, ensure both sides are on the same network segment.
Walker Tienkung factory network segment:
192.168.41.xConfigure the target machine's physical Ethernet port to a static IP in the same network segment, for example:
IP Address: 192.168.41.100
Subnet Mask: 255.255.255.0
Use the following command to check whether the target machine can access the Orin board:
ping 192.168.41.2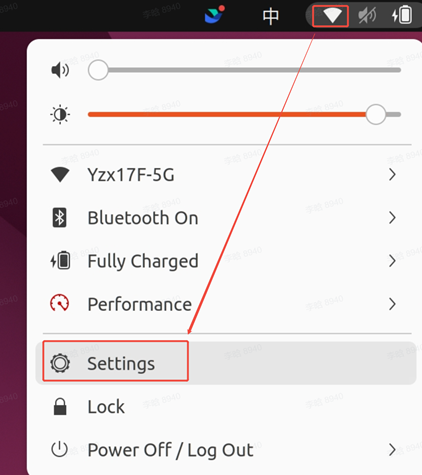 Ubuntu wired network configuration entry
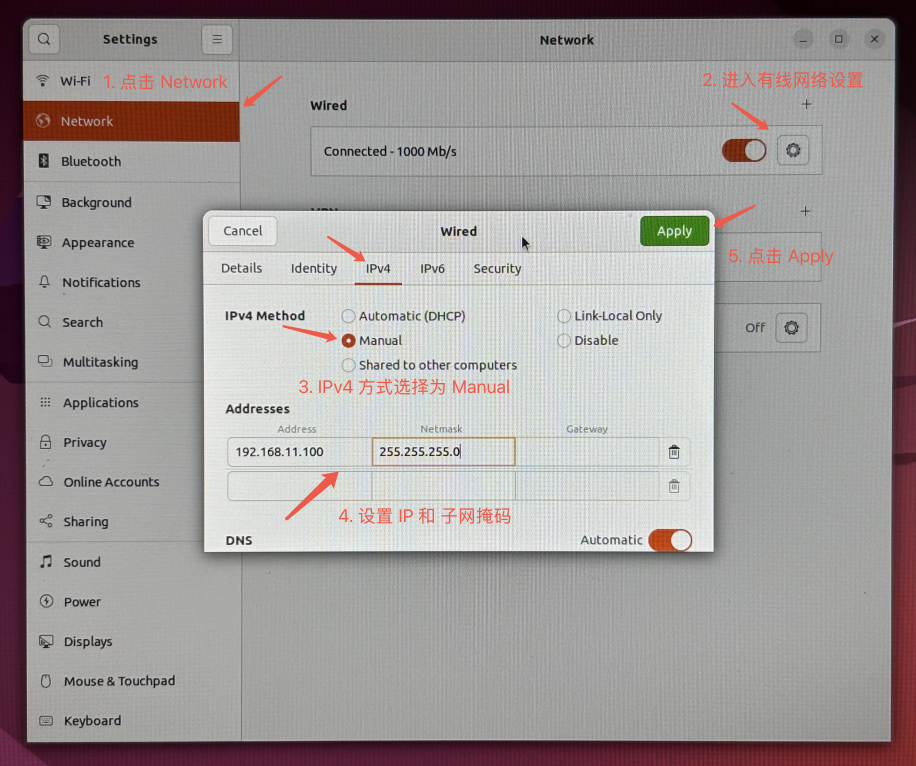 Ubuntu IPv4 manual configuration example
Pre-use Preparation
Please confirm:
- The target machine has Thinker studio installed.
- The target machine has completed network configuration and can access
192.168.41.2. - Walker Tienkung is powered on.
- Pico, body trackers, and remote controller are ready.
Select Robot
Find the Thinker studio icon in the application center on the target machine and click it to open the client.
On the robot selection page, select "Walker Tienkung" to enter the teleoperation page.
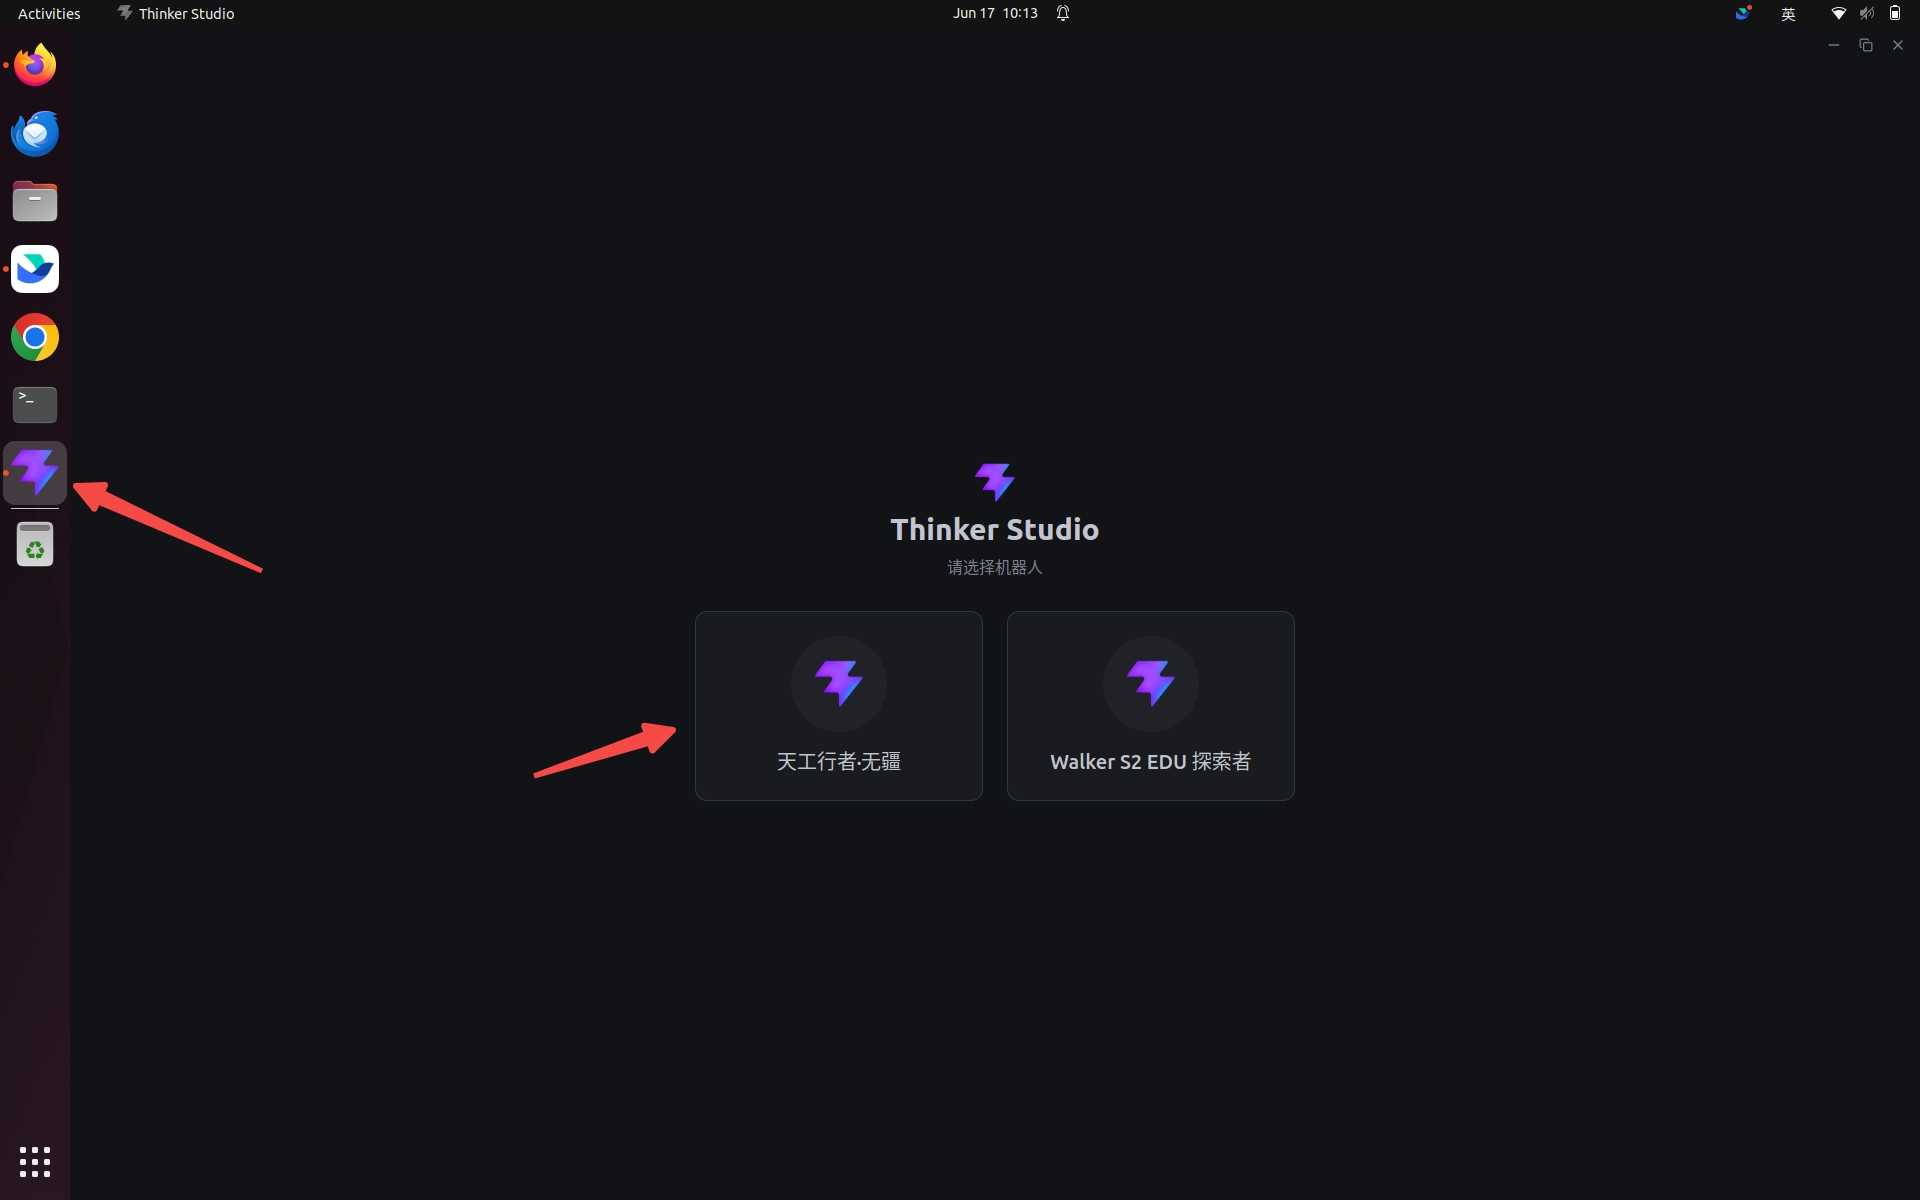 Thinker studio client icon
Start Pico Teleoperation
Start Teleop Service
Start the Teleop Service service in the Thinker studio client.
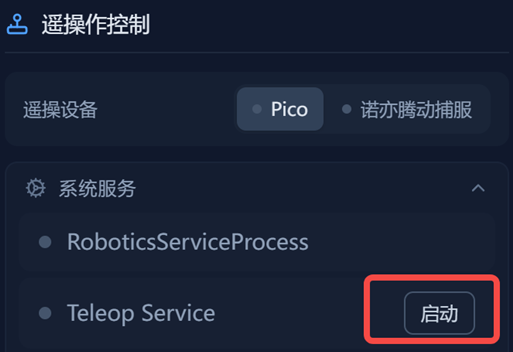 Start Teleop Service
This service is used to receive tracking and control data sent from the Pico side. After the service starts, keep the client page open.
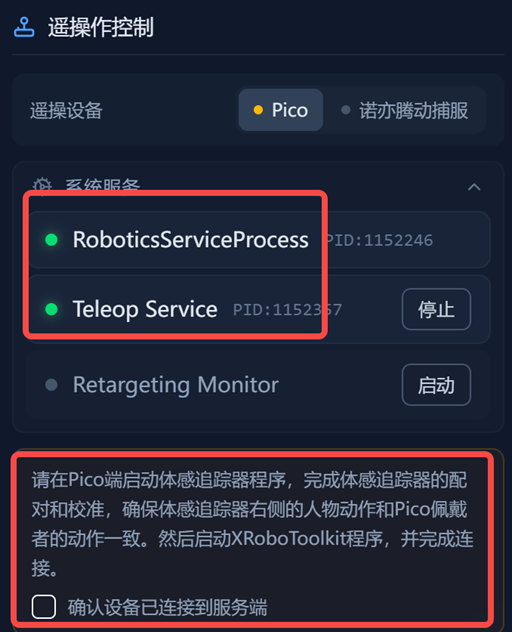 Teleop Service running
Pico-side Operations
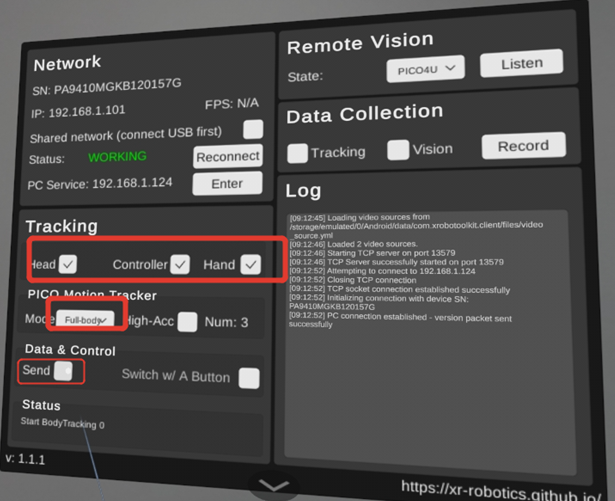
For tracker wearing, XRoboToolkit connection, checking Send, and other Pico-side operations, please refer to the Pico Operation Guide.
Start Retargeting Monitor
Start the Retargeting Monitor service in the Thinker studio client.
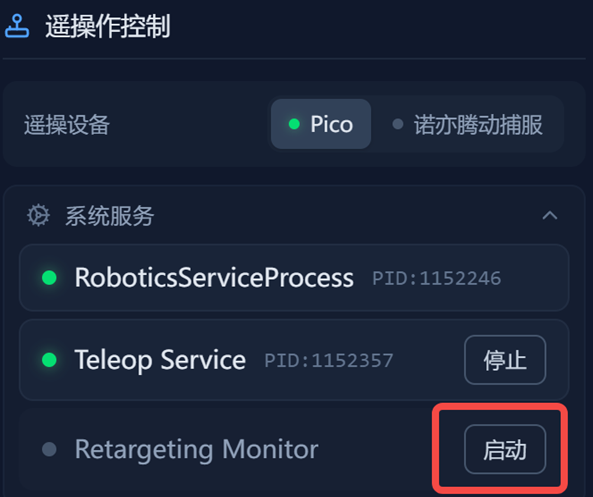 Start Retargeting Monitor
This service is used for motion retargeting monitoring during teleoperation.
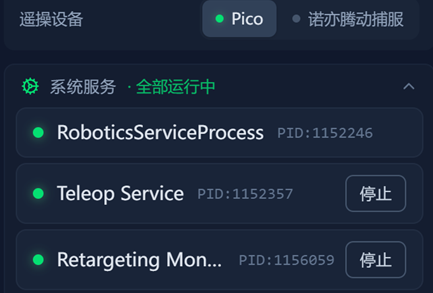 Retargeting Monitor running
Enter Robot Upper Limb Control Mode
Before starting teleoperation, you need to put Walker Tienkung into upper limb control mode, also known as half-body control mode.
Please operate in the following order:
- Confirm that Walker Tienkung is powered on. Open the main power switch on the left side of the robot's back, then short-press the power button on the right side.
- Turn on the remote controller. Short-press the remote controller switch, then long-press the remote controller switch.
- Press
Aon the remote controller to make the robot perform self-check. - After self-check is complete and a "beep" is heard, wait for 5 seconds.
- Toggle the
Fswitch down. - Long-press
Aon the remote controller until a "beep" is heard. - Toggle the
Eswitch up.
After completing the above steps, click Start in the teleoperation area of the Thinker studio client.
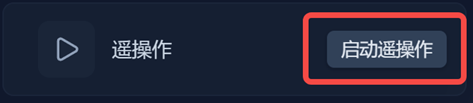 Click to start teleoperation
Safety Reminder
After clicking
Start, the robot will begin to follow movements. Please confirm that the robot's surrounding environment is safe and spacious, and avoid people or objects entering the robot's motion range before clicking.
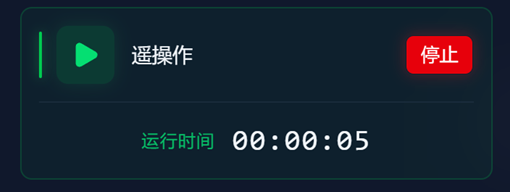 Teleoperation started successfully
End Teleoperation
When ending teleoperation, please operate in the following order:
- Click
Stopin the teleoperation area of the Thinker studio client. - Stop related services, such as
Teleop ServiceandRetargeting Monitor. - If you need to pause Pico control data sending, you can uncheck
SendunderData & ControlinXRoboToolkiton the Pico side.
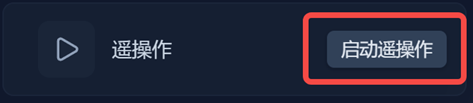 Stop teleoperation
 Stop related services
Motion Recording
Start Recording
Motion recording requires the following prerequisites:
- Currently in teleoperation mode.
- Data collection is not currently started.
Click Start in the motion recording area of the Thinker studio client to begin motion recording.
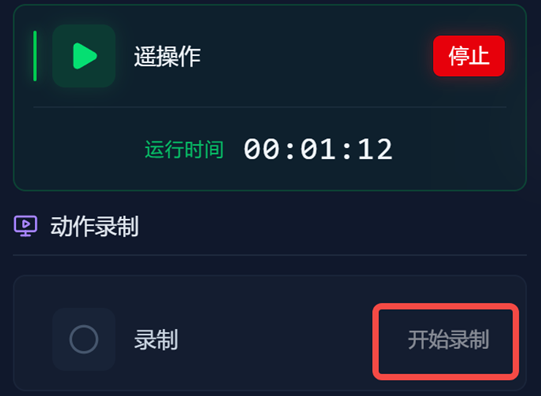 Start motion recording
During recording, the Send status of XRoboToolkit on the Pico side affects whether the robot follows the operator's movements:
- Check
Send: Pico sends control data, and the robot follows the movements. - Uncheck
Send: Pico does not send control data, and the robot does not follow the movements.
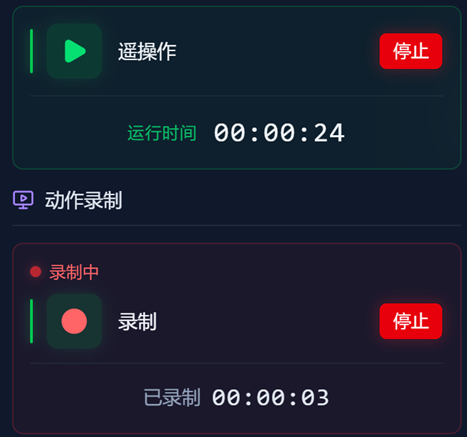 XRoboToolkit Send status
End Recording
Click End in the motion recording area to complete the recording.
After the recording is successful, the recorded motion will be displayed in the recording history area on the right.
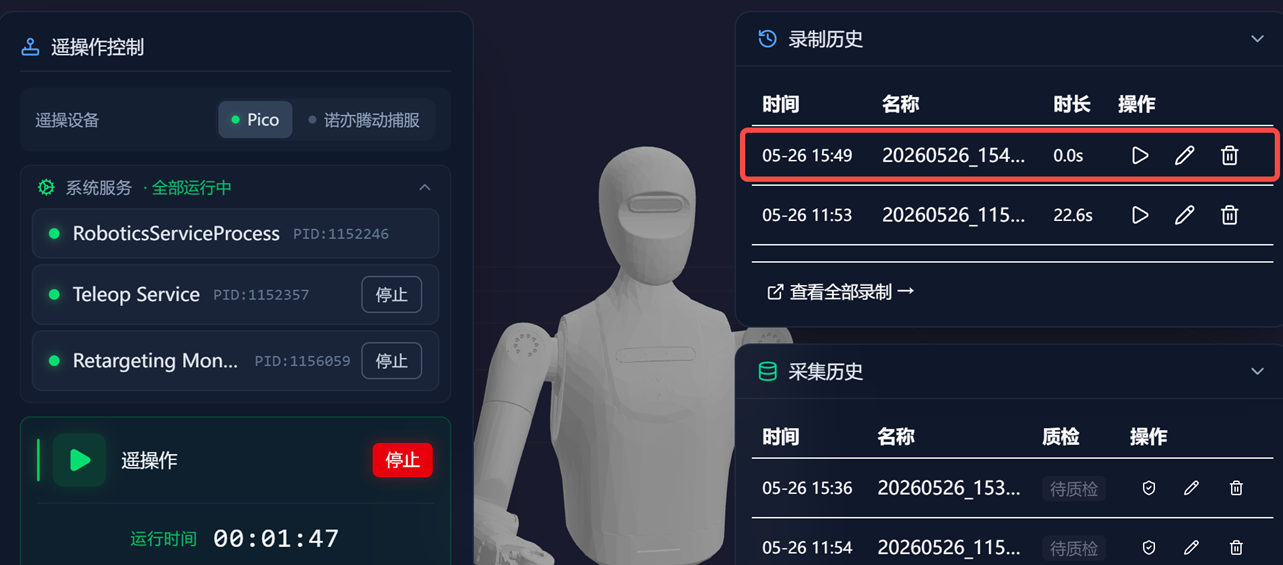 Motion recording history
Play Recorded Motion
Motions in the recording history can be played back.
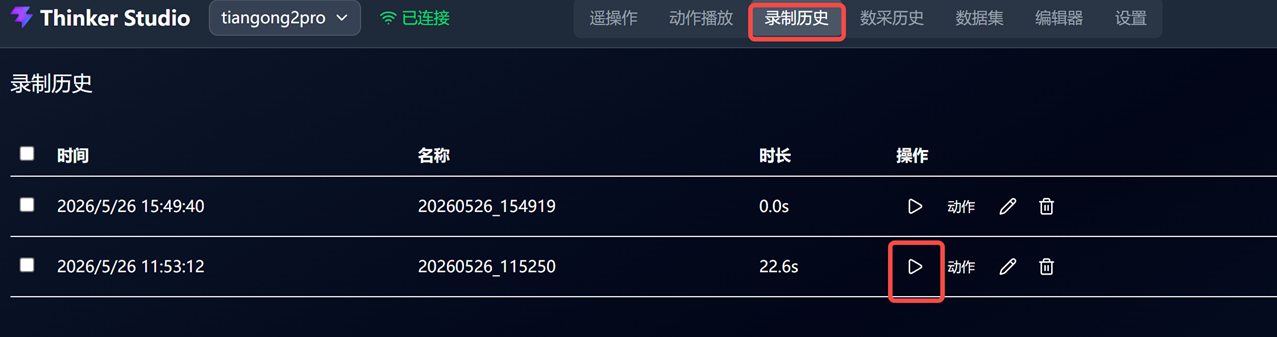 Play recorded motion
Safety Reminder
Before playing a recorded motion, please confirm that there is enough space around the robot to avoid collisions with people, equipment, or surrounding objects.
Data Collection
Data collection is used to collect camera data and arm joint angles.
Before starting data collection, you must first start the head camera service on the Orin board of Walker Tienkung at 192.168.41.2. Otherwise, data collection will fail or no camera data will be collected.
Start Head Camera Service
SSH into the Orin board from the target machine:
ssh nvidia@192.168.41.2Password:
nvidiaStart the head camera service:
sudo systemctl start orbbec_head.serviceConfirm that the camera compressed topic exists and has data:
ros2 topic echo /ob_camera_head/color/image_raw/compressed --no-arrIf the command continuously outputs data, the compressed image topic is normal. After confirming, you can press Ctrl+C to exit the view.
Start Collection
Data collection can only be started when no motion is being recorded.
Safety Reminder
Before starting data collection, please confirm that the robot's surrounding environment is safe and spacious, and avoid people or objects entering the robot's motion range.
Click Start in the data collection area of the Thinker studio client to begin collection.
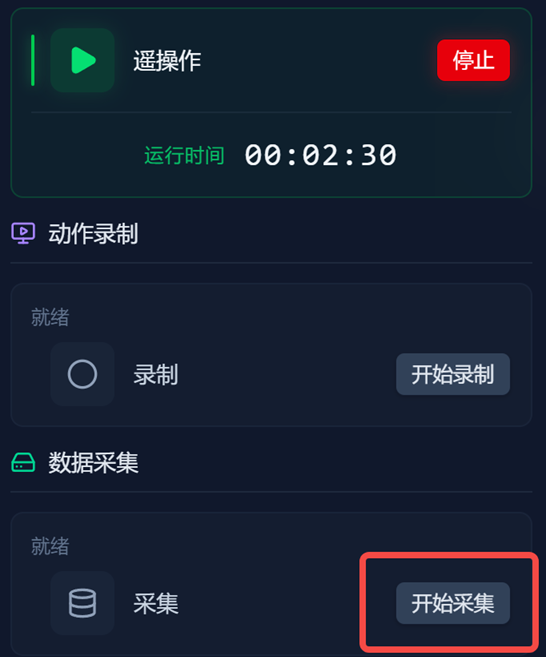 Start data collection
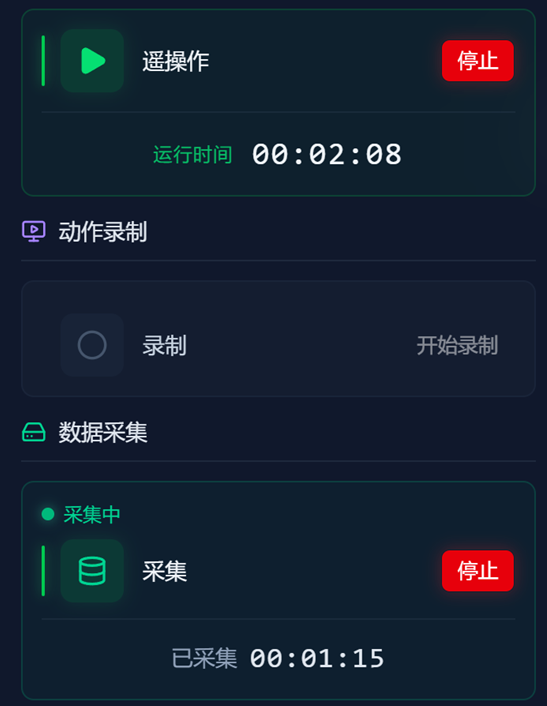 Data collection started successfully
End Collection
Click End in the data collection area to stop collection.
After successful collection, the collected data will be displayed in the collection history area on the right.
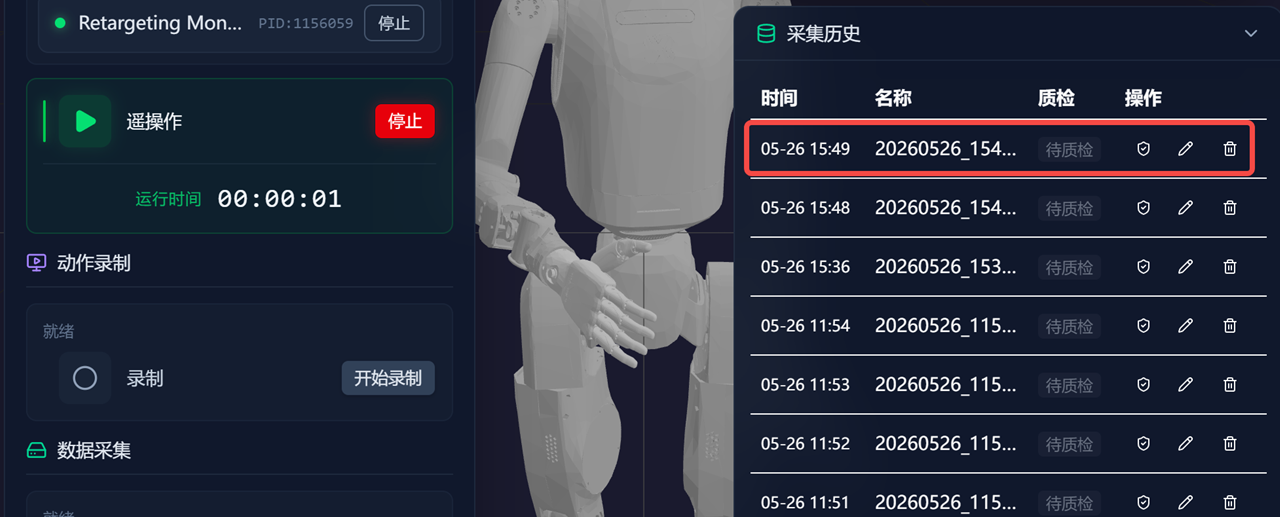 Collection history
Data Quality Inspection and Export
Data Quality Inspection
Select the data to be processed in the collection history and click Quality Check to enter the data quality inspection page.
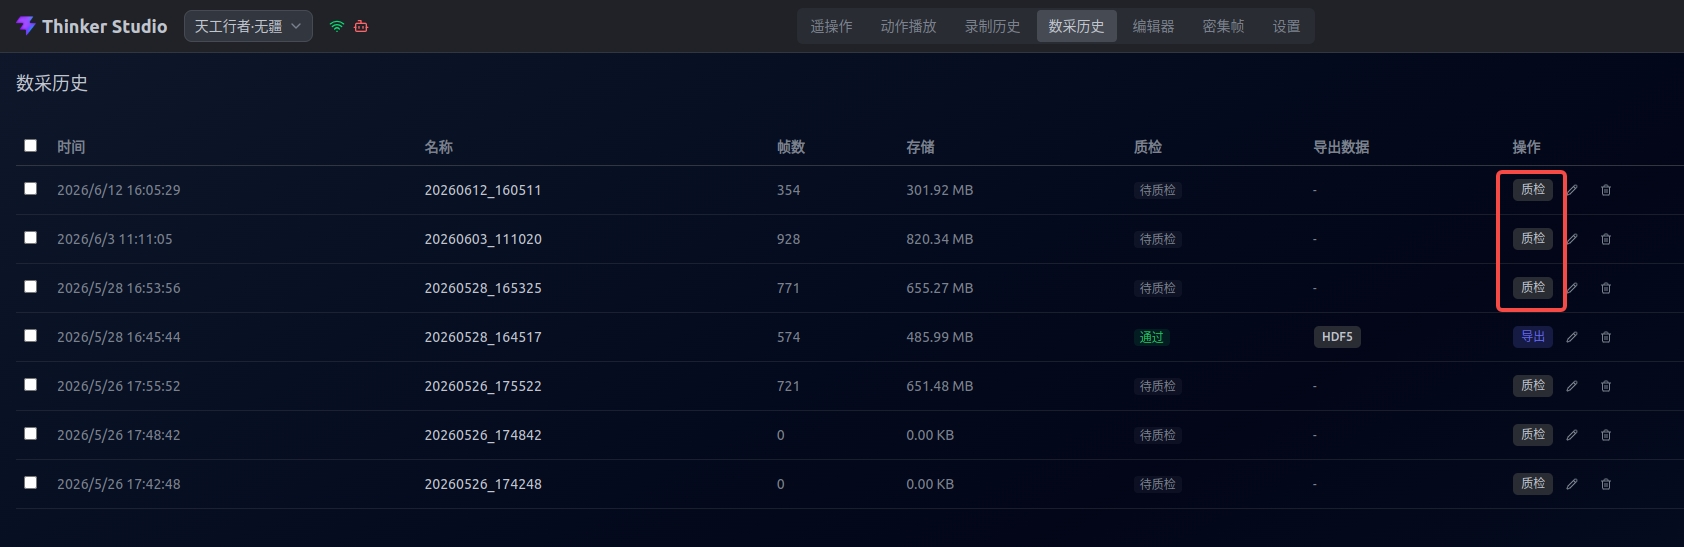 Enter quality inspection
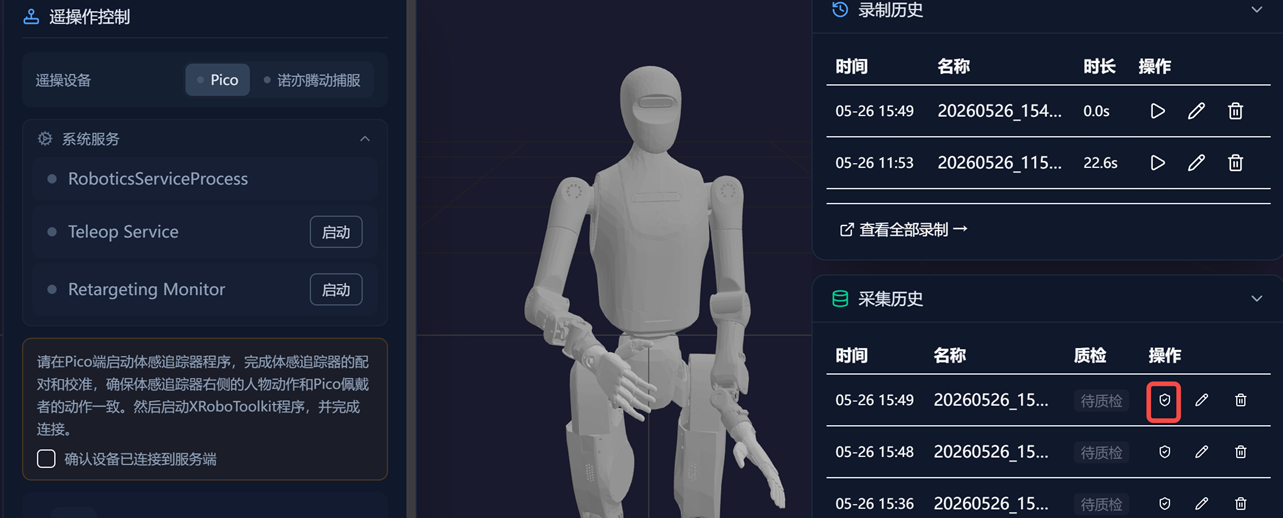 Quality inspection page
The quality inspection page supports adding multiple region frames and adding descriptions for the region frames. Click Submit when finished.
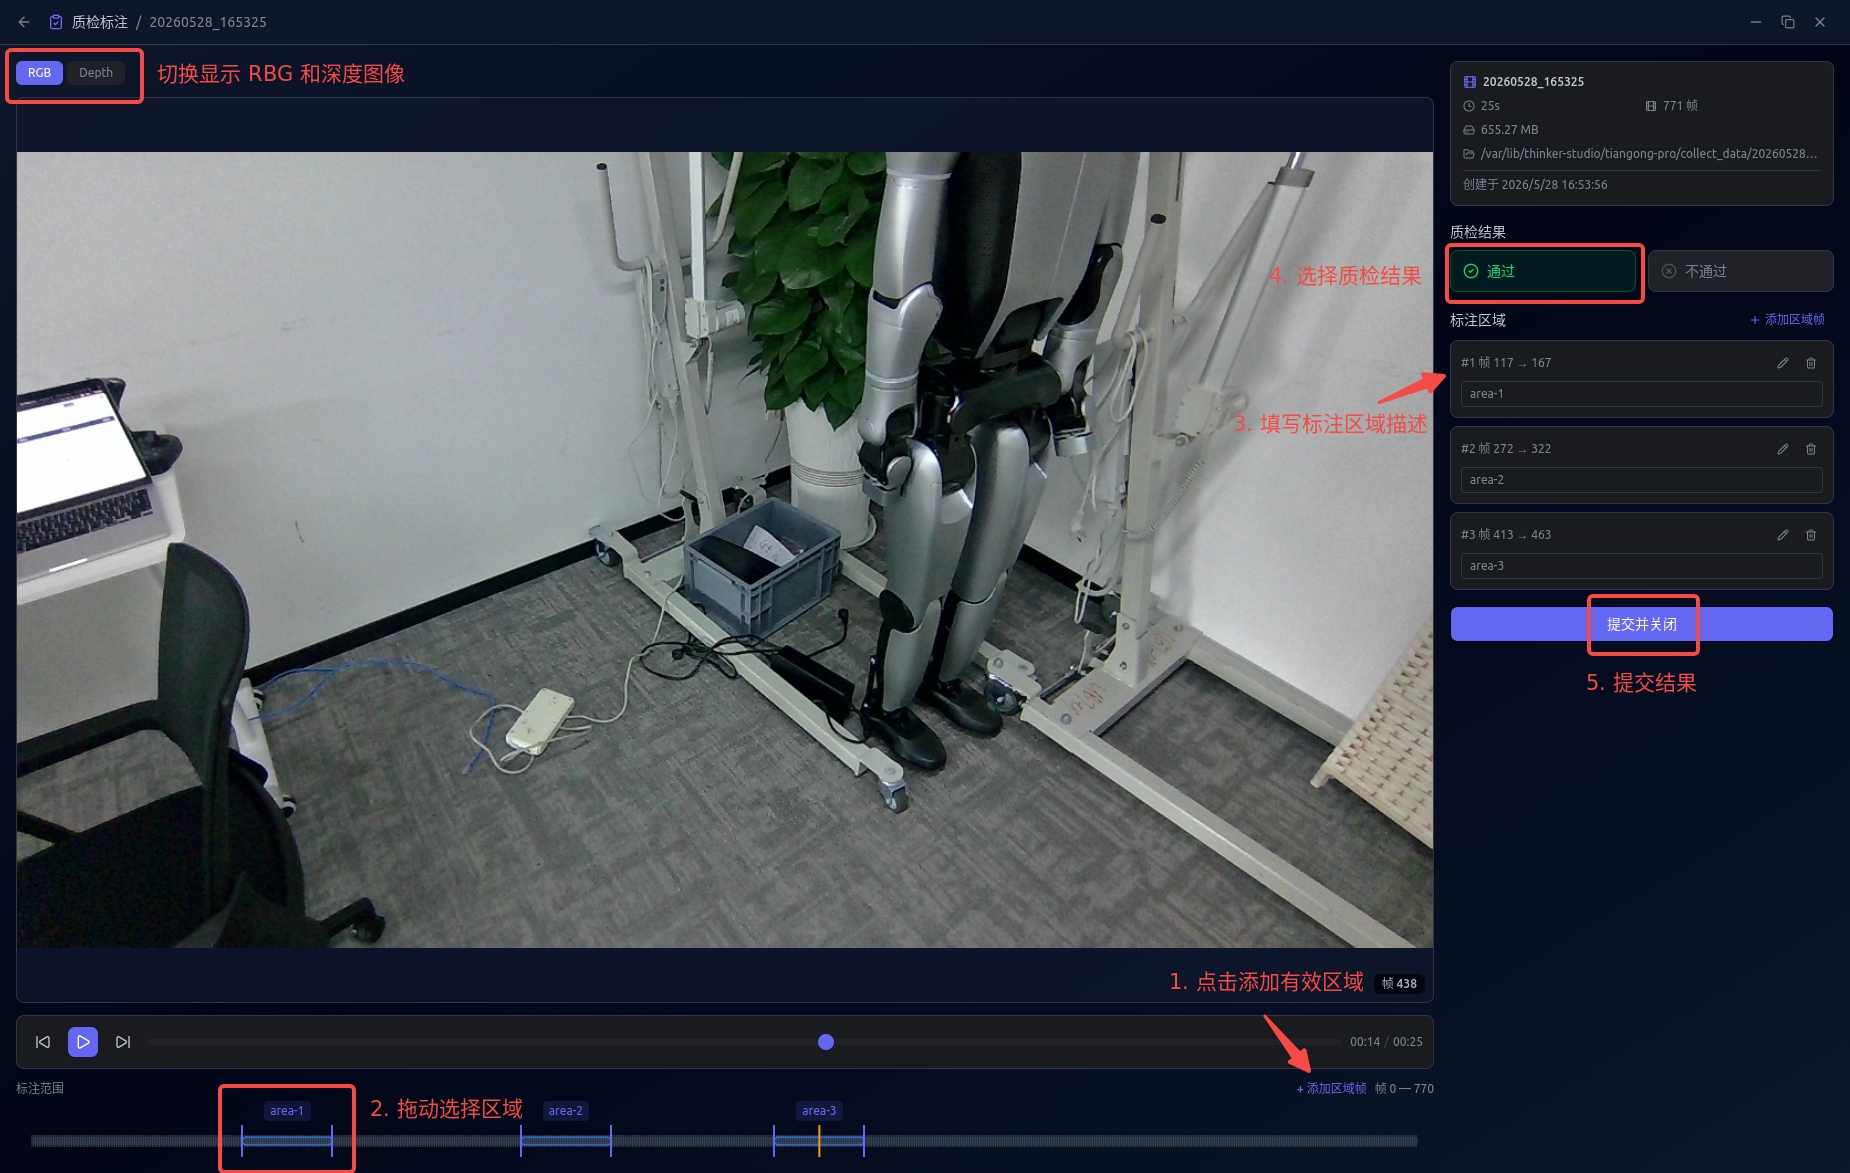 Submit quality inspection description
Data Export
Data that has completed quality inspection will display an Export button.
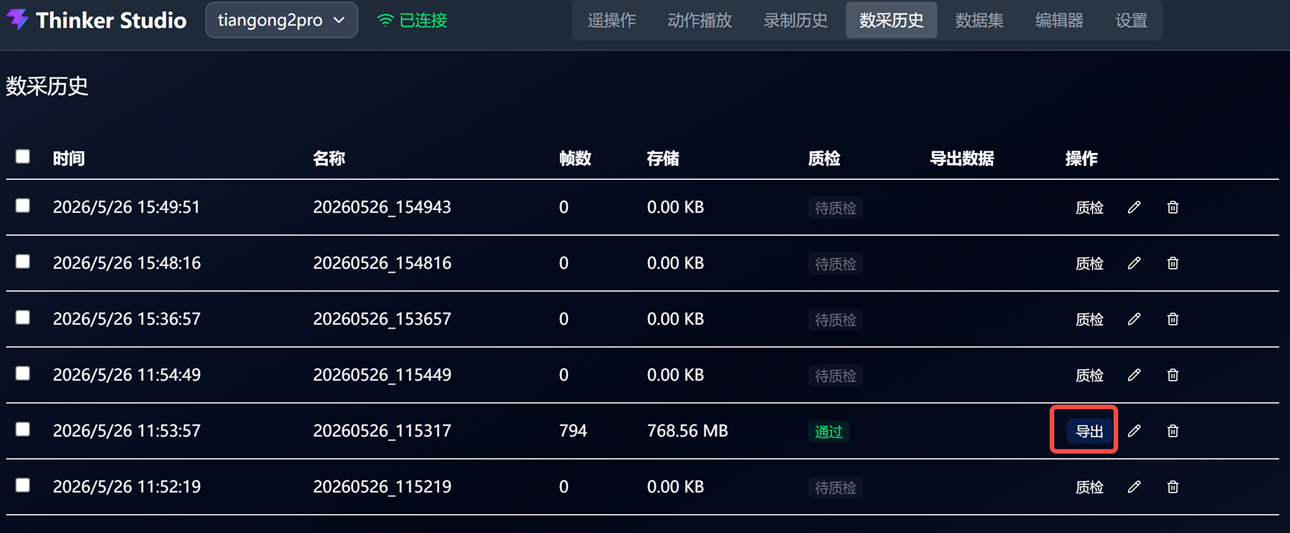 Export button
After clicking Export, select the desired export format. The larger the data volume, the longer the export time.
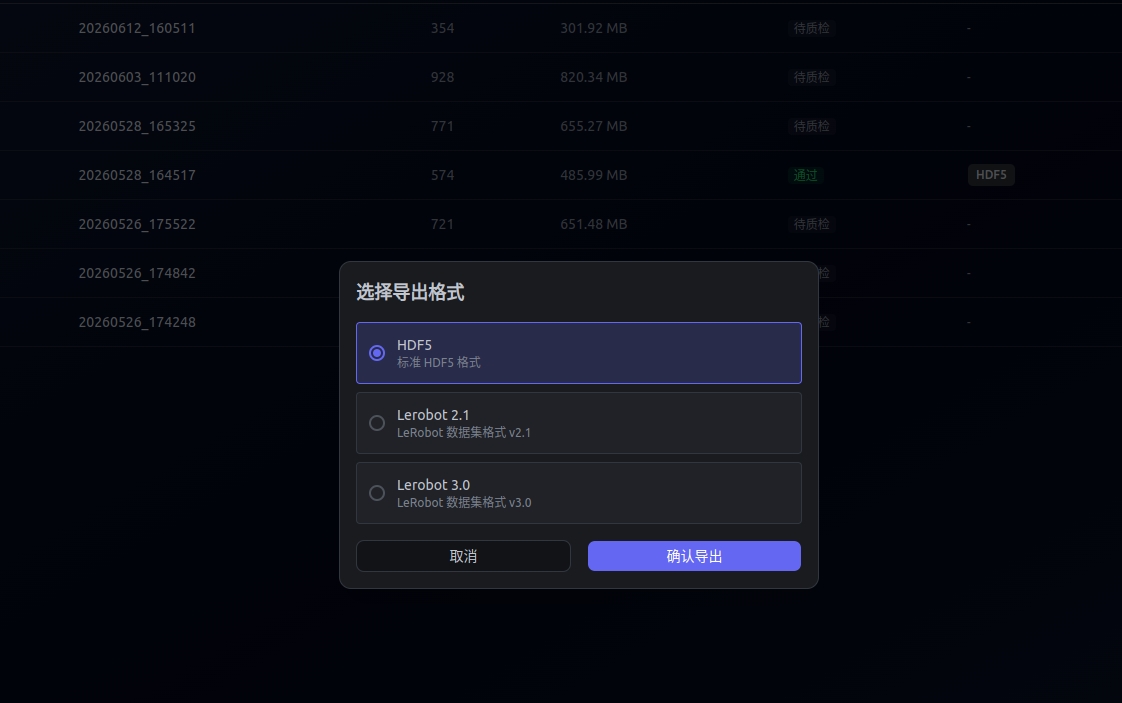 Select export format
After successful export, refresh the page. The page will display the exported data directory, and you can click to copy the directory path.
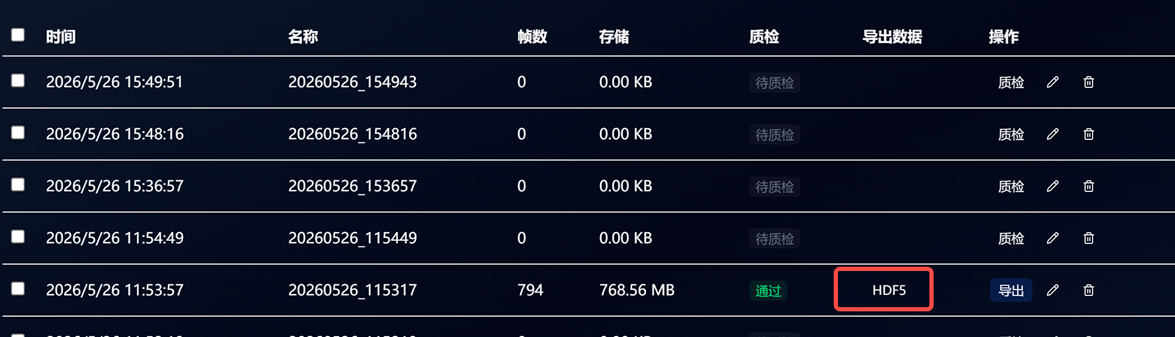 Exported data directory
FAQs
Data collection fails to start
Please check the following items first:
- Whether Walker Tienkung is powered on.
- Whether the target machine can access
192.168.41.2. - Whether
orbbec_head.serviceon the Orin board is started. - Whether the
/ob_camera_head/color/image_raw/compressedtopic exists and continuously outputs data.
Appendix: Manual Installation of Camera Compressed Topic Components
This section is mainly for R&D or operations personnel. Under normal circumstances, the installation script will automatically handle the camera compressed topic components when the target machine and Walker Tienkung are directly connected via Ethernet and Walker Tienkung is powered on.
Start Camera Service and Check Topic
Log in to the Orin board:
ssh nvidia@192.168.41.2Password:
nvidiaStart the head camera service:
sudo systemctl start orbbec_head.serviceCheck whether the following compressed image topic exists:
ros2 topic echo /ob_camera_head/color/image_raw/compressed --no-arrIf the topic already exists and has data, no further installation is needed.
Install Dependencies on the Orin Board
export ROS_DISTRO=humble

sudo apt install libgflags-dev nlohmann-json3-dev \
  ros-$ROS_DISTRO-image-transport \
  ros-$ROS_DISTRO-image-transport-plugins \
  ros-$ROS_DISTRO-compressed-image-transport \
  ros-$ROS_DISTRO-image-publisher \
  ros-$ROS_DISTRO-camera-info-manager
Copy Compressed Component Files
Please first download the following two files to the /home/ubuntu/Downloads directory on the target machine:
rvl_codec.hpplibcompressed_depth_image_transport.so
Execute on the target machine:
scp /home/ubuntu/Downloads/rvl_codec.hpp nvidia@192.168.41.2:/home/nvidia/
scp /home/ubuntu/Downloads/libcompressed_depth_image_transport.so nvidia@192.168.41.2:/home/nvidia/
Install to Orin Board ROS Directory
Log in to the Orin board again:
ssh nvidia@192.168.41.2Execute:
sudo cp /home/nvidia/rvl_codec.hpp /opt/ros/humble/include/compressed_depth_image_transport/
sudo cp /home/nvidia/libcompressed_depth_image_transport.so /opt/ros/humble/lib/
After installation, it is recommended to power off and restart the robot.
After restarting, log in to the Orin board again and start the head camera service:
sudo systemctl start orbbec_head.serviceConfirm that the compressed image topic exists and has data:
ros2 topic echo /ob_camera_head/color/image_raw/compressed --no-arr